Being a mum to four, I always try and bake something this time of year where the kids can actually get involved. My little one especially loves to don my mother-in-law’s old floral apron, pull up a chair and help sift flour or stir ingredients with her own wooden spoon or do anything with chocolate…and I just treasure it…even when I’m finding flour in corners of my kitchen for days!!
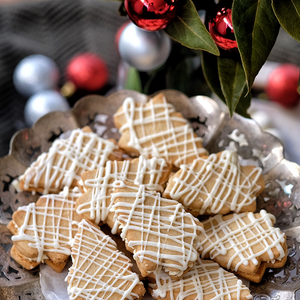
These little Christmas Kisses hit the brief every time. They are simply beautiful, delicious and give plenty of opportunity for the kiddies to get baking! Teaming with the team at CSR Sugar to play with their new Buttercream Icing Mixes, I also grabbed the opportunity to luxe up the biscuits by adding beautiful little drops of vanilla buttercream to stick the two bikkies together.
Made with no added colours, preservatives or artificial flavours, the CSR Sugar All Natural Buttercream Icing Mixes are gluten free and available in the three classic flavours of vanilla, chocolate and strawberry…and are perfect to use in any piping work!
It is also so simple to change up the recipe to be able to serve these bikkies any time of year. Simply swap the Christmas cookie cutters with 5.5cm fluted round cutters and then proceed with the rest of the recipe! The flavour combination of vanilla, cinnamon and chocolate is simply too good to make these bikkies just at Christmastime!
I’m sure you will love this recipe. As always, I love to see your creations so please don’t forget to tag me and place #mckrecipes in your captions so I can find you!
Merry Christmas to you and your loved ones!
H xx
Serves: Makes 20 cookies
Preparation Time: 15 minutes (plus 25 minutes cooling time)
Cooking Time: 11-12 minutes
For the biscuits:
For the glaze:
Method
1. Place the butter, sugar, egg yolk, vanilla and ground cinnamon in a large bowl. Mix with a wooden spoon until lovely and smooth. Add the sifted flour and fold until it all comes together. Tip onto a lightly floured surface and lightly knead until the dough is smooth and does not stick to your hands. If it does stick, dust your hands with a little flour and keep repeating until it no longer sticks.
2. Separate the dough into two pieces and place each half between two sheets of baking paper. Roll out with a rolling pin so that the dough is about 4mm thick. Refrigerate the rolled out sheets of dough, as they are between the baking paper, for 25 minutes.
3. Preheat the oven to 180C. Grease and line two large oven trays and set aside.
4. Using Christmas tree shaped cookie cutters, cut trees from the dough and pop on the oven trays, making sure not to crowd the trays. Re-roll the dough as necessary to cut extra trees. If the dough becomes too soft, roll out between baking paper and pop in the fridge for a little to firm up again.
5. Pop the trays in the oven to bake for 11-12 minutes or until lightly golden and smelling delicious. Cool on trays.
6. Once the cookies have completely cooled, make the vanilla buttercream in accordance with the directions on the back of the packet. Place in a large piping bag fitted with a medium star tip. Set aside.
7. To assemble, using the piping bag, pipe dollops of buttercream on the whole surface of a biscuit. Top with another biscuit. Repeat with the remainder of the biscuits.
8. To finish off the kisses, make the glaze by melting the white chocolate in a heatproof bowl over simmering water until it is completely smooth. Stir in the coconut oil and cool until it is only slightly warm yet still runny. Place in a small piping bag and cut just a smidge of the tip (or alternatively place the drizzle into a ziplock bag and make a small cut in one of the corners).
9. Gather the assembled biscuits closer together on the trays and, using the piping (or ziplock) bag, haphazardly drizzle the glaze over the top. Give the glaze about 15 minutes to set before serving. These biscuits are best served on the day they are assembled although they may be stored in an airtight container for 3 days.


